Learn the Make Dataset Card System with One Workflow
This is not a feature tour of four separate cards. It is one complete workflow: start from a two-atom Si cell, generate doped and vacancy candidates in parallel, then apply a small perturbation and a geometry filter. After completing it once, you should understand card order, Card Group branches, enabled states, input/output counts, and workflow reuse.
First, Understand the Buttons on Every Card
Every card uses the same title-bar controls:
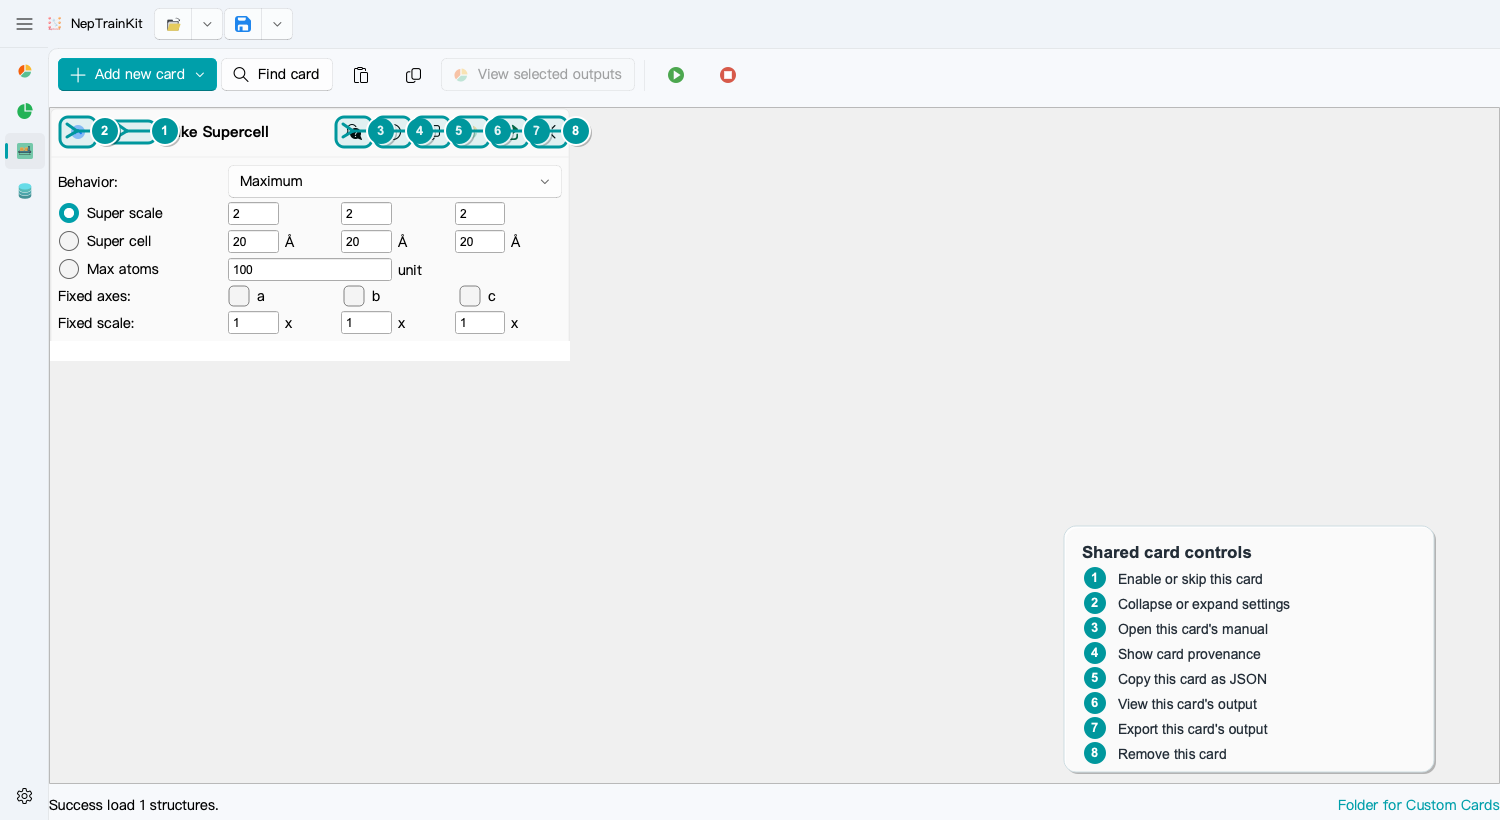
No. |
Function |
When to use it |
|---|---|---|
1 |
Enable or skip the card |
Clear the checkbox to skip this card when the workflow runs. The next card receives the output of the previous enabled card. |
2 |
Collapse or expand |
Collapse a configured card to see the whole workflow and reorder cards more easily. |
3 |
Online manual |
Read the full parameter reference, limitations, and intended use cases for this card. |
4 |
Card information |
View version, maintainer, and provenance information. |
5 |
Copy this card as JSON |
Copy the current parameters, then use |
6 |
View this card’s output |
Available after a successful run. It sends only this card’s results to |
7 |
Export this card’s output |
Save the intermediate structures from this step; this does not save the workflow itself. |
8 |
Close the card |
Remove it from the workspace. Previously exported files are not deleted. |
Drag a card by its title bar to change the order. Run the workflow again after reordering because each top-level card passes its output to the next enabled card.
Build the Example
Use
Loadin the upper-left corner to importSi2.vasp.Use
Add new cardorFind cardto addSuper Cell,Card Group,Random Doping,Vacancy Defect,Atomic Perturb, andGeometry Filterin that order. New cards first appear at the top level.Drag
Random Dopingby its title bar into the empty area ofCard Group, then do the same withVacancy Defect. If a card is grouped by mistake, drag it back to an empty area of the workspace to return it to the top level.Drag the title bars to arrange the remaining top-level cards as shown below, then enter the parameters.
Super Cell
→ Card Group [Random Doping | Vacancy Defect]
→ Atomic Perturb
→ Geometry Filter
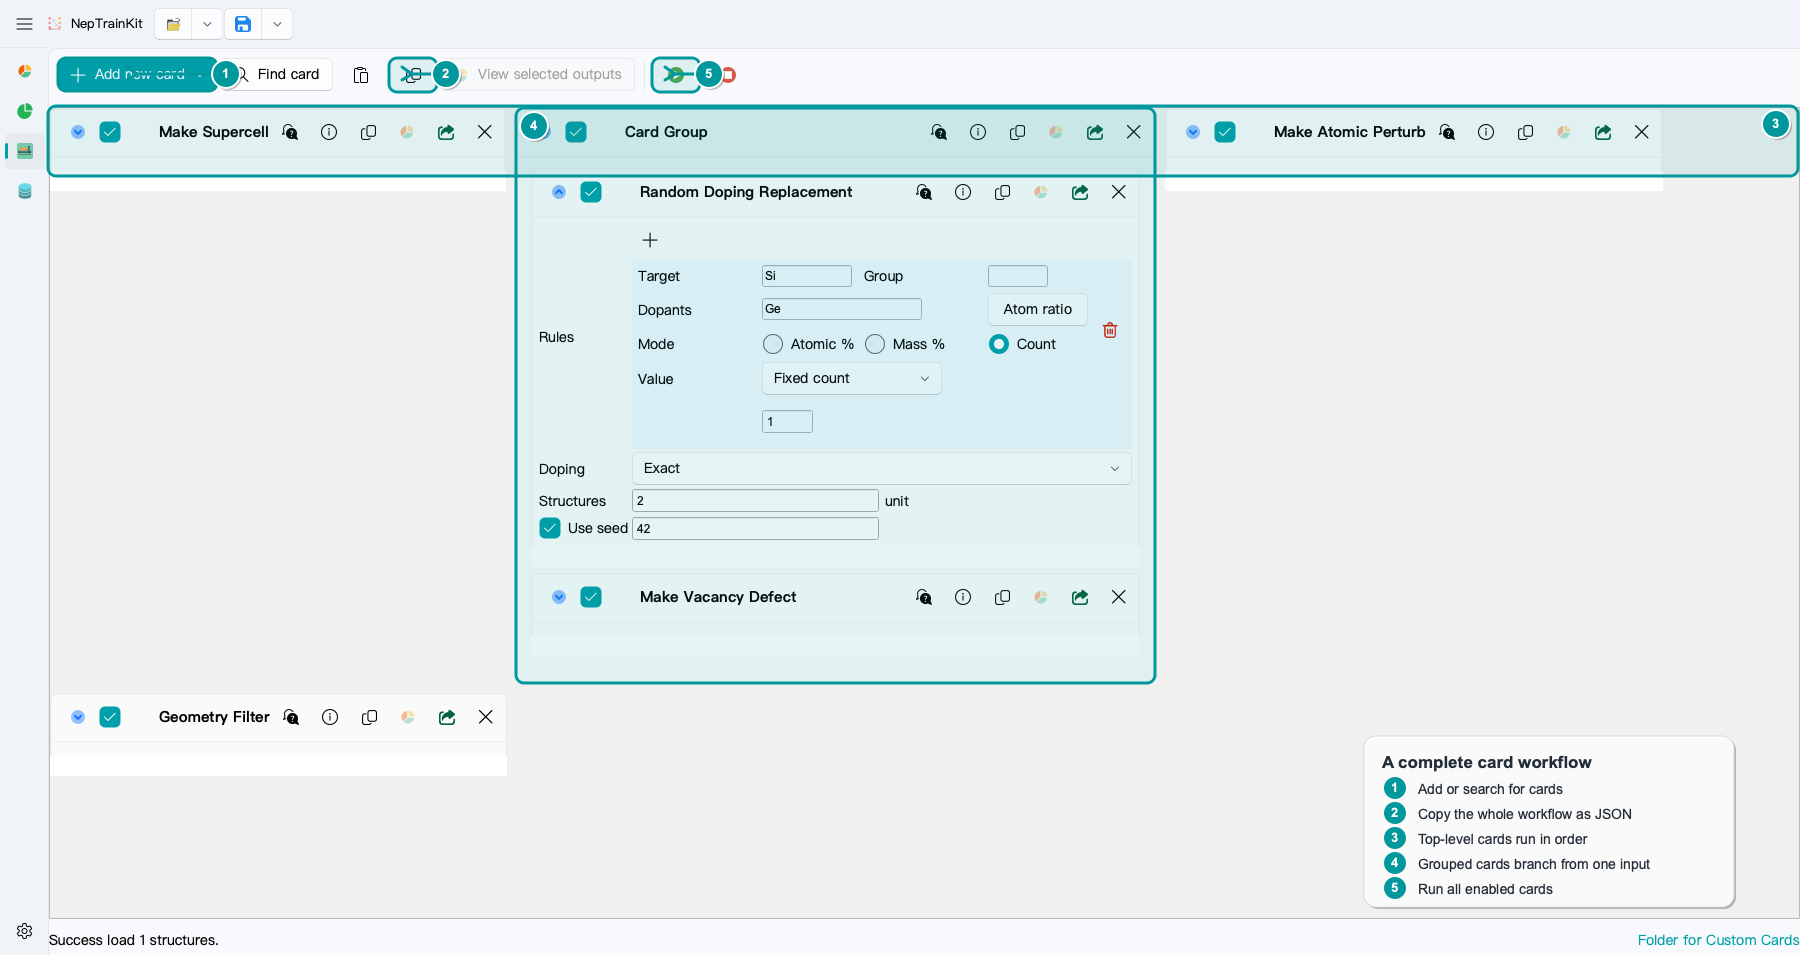
The top controls operate on the whole workflow: Copy JSON copies all current cards, Paste JSON appends clipboard configuration to the existing workflow, Run executes all enabled cards, and Stop aborts the running cards. Copy JSON in a card title bar copies only that card, so do not confuse the two.
These parameters are chosen only to make the data flow easy to follow:
Step |
Key settings |
Expected output |
|---|---|---|
|
|
One 16-atom Si supercell |
|
Target |
Two |
|
Remove exactly 1 atom; generate 2 structures; seed |
Two 15-atom Si vacancy structures |
|
Maximum displacement |
\(4\times2=8\) perturbed structures |
|
Minimum distance |
Remove obvious collisions and invalid cells |
The dopant field does not use JSON. Enter Ge for one element or Ge:0.7,C:0.3 for a multi-element ratio. Restored settings keep this editable notation so you can copy and adjust it directly.
Do Not Confuse a Sequential Chain with Card Group
Top-level cards run sequentially: the Super Cell output enters Card Group, the merged branch results enter Atomic Perturb, and the result finally goes to Geometry Filter. This is why supercell generation belongs before defect generation and filtering belongs after random generation.
Cards inside Card Group are parallel branches. In this example, both Random Doping and Vacancy Defect receive the same 16-atom Si supercell; one does not feed into the other:
::
Use Card Group only when the same input should follow several independent routes. If you want to dope first and then create vacancies in the doped structures, place both cards at the top level in the order Random Doping → Vacancy Defect instead of putting them in one group.
Check the Counts after Running
Select the cards that should participate, then click Run at the top:
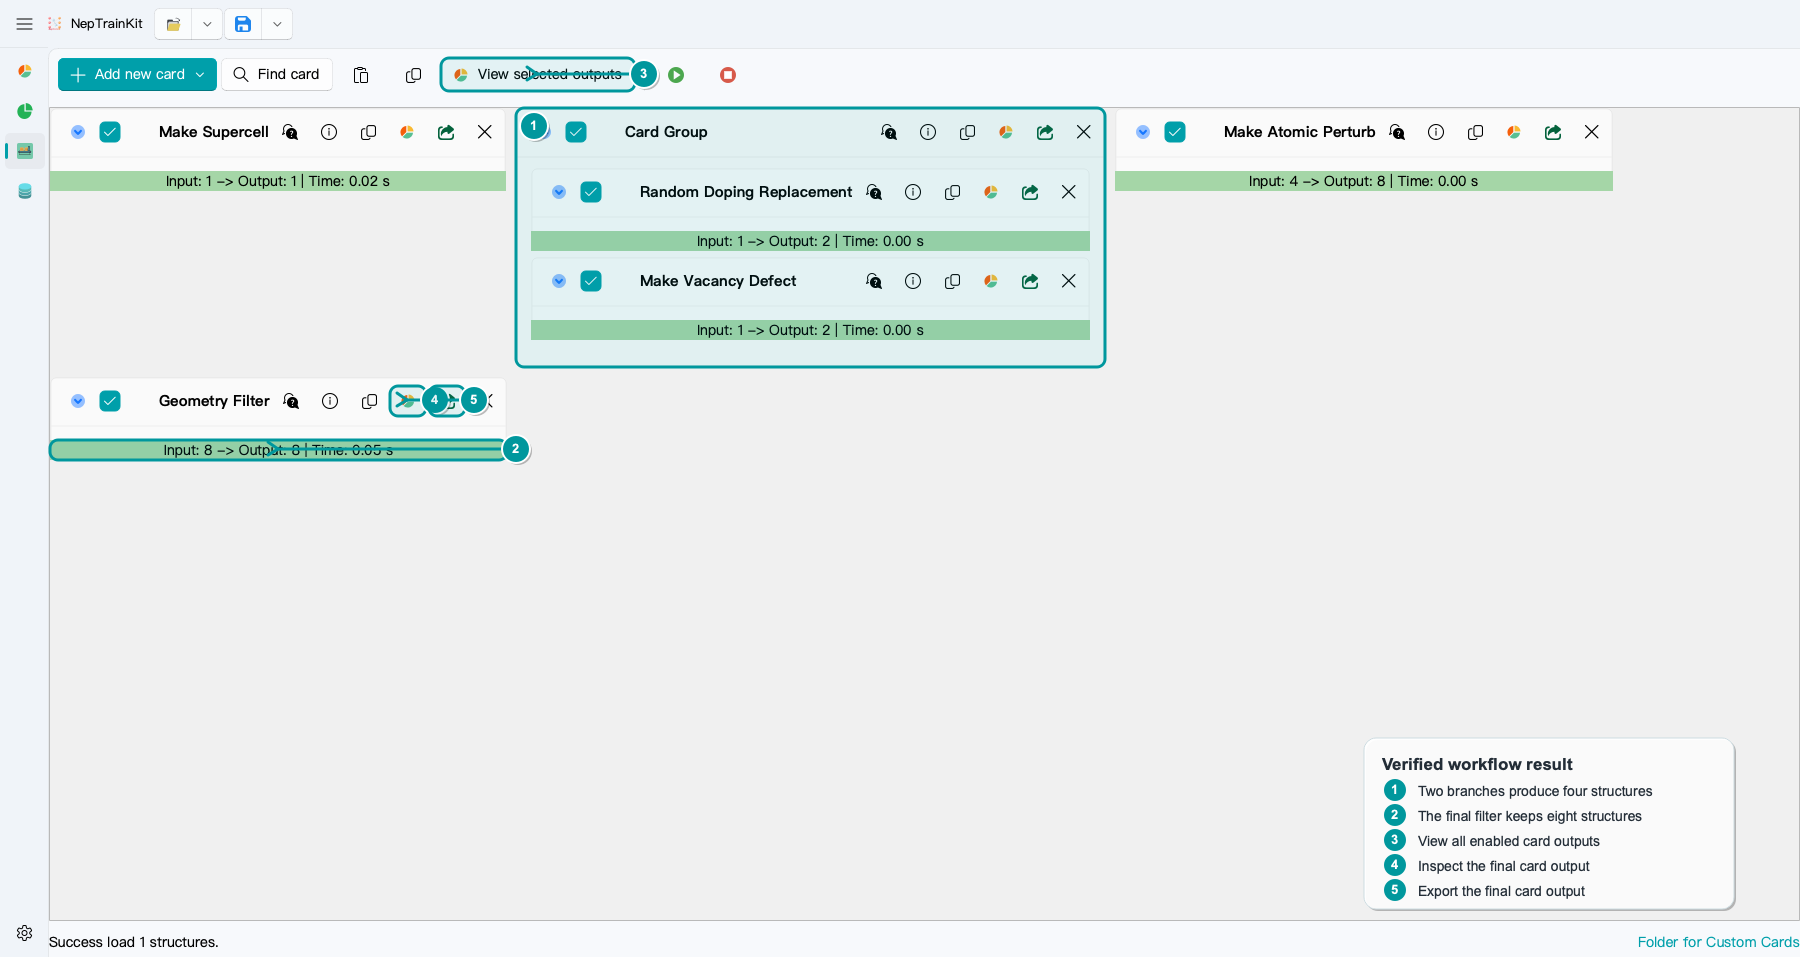
The verified result of this example is:
::
Each card shows Input → Output / Time at the bottom. If a count first becomes unexpected at a particular step, inspect that step instead of checking only the final file. If a card produces no output, the workflow stops there and downstream cards do not run.
After the run, there are three viewing or export scopes:
The view and export buttons in a card title bar operate only on that card’s output.
View selected outputsat the top merges the outputs of all checked cards that have results, including intermediate steps.Export final workflow outputin the topSavemenu saves only the output of the last completed enabled card. UseExport all available card outputsto keep all intermediate results.
Are You Saving Structures or the Workflow?
Keep these two concepts separate:
Copy JSONorSave → Export Card Configsaves card order, parameters, and enabled states. It does not contain generated structures.Paste JSONappends a single card, a card list, or a complete workflow from the clipboard to the current workspace. It does not clear existing cards.Use
Load → Import Card Configto restore a workflow from a JSON file.Exporting a card output or the final workflow output is what saves structure data.
After the workflow works as intended, save a copy of its JSON. When changing the input structures, check that their elements, atom counts, and cells still fit these parameters before running. A reusable workflow configuration is not a physically valid recipe for every material.